I thought that I'd write up a quick toot on how I do my bases for 28-30mm games that I play.
Basically, I like to weight my figure bases with lead, which I find helps to keep them figures stable - important in skirmish-level games as there is often a lot more terrain than in more army-orientated games. Plus I can make cool poses and bases without worrying that they might fall over!
Step 1Turn the base over and using a strong sharp knife, carefully cut the slot out of the base.
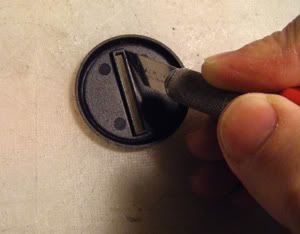 Step 2
The base should now look like this. I normally check the other side too, to make sure that the cut is neat.
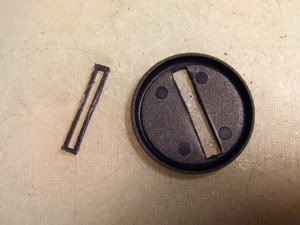 Step 3
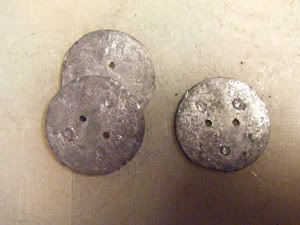
For the weights, I use lead curtain weights. I got mine from
Merrick & Day a while back.
 Step 4
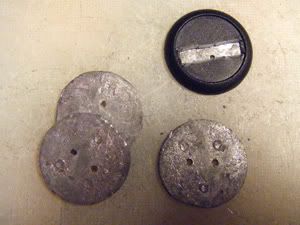
The lead weights will need trimming slightly to get a snug fit into a standard 30mm base. After a dry-test fit, I then use lots of thick superglue and stick the weight into the base and make sure it sits flat. Leave it somewhere to dry overnight.
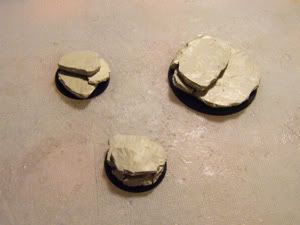
 Step 5
After the bases are all dry, I mix up some yellow-grey Milliput and pack the underside really well. I also add a little bit to the slot on the top. After about an hour, rinse the base under some warmish water to give the putty a final smoothing, and to ensure you clean off any excess putty off the rim or top. Leave this to cure for a day at least - preferably two or three. This allows you to sand the bottom of the bases flat and smooth. The basic base prep is now done.
 Step 6
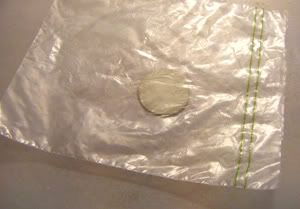
Meanwhile, mix up another quantity of yellow-grey Milliput and put it into a sandwich bag. Using a rolling pin (or a screw-top glass wine bottle filled with water if you dont have (permission to use) one), flatten the putty out to the desired thickness. I would suggest that about 3mm thick is good for flagstones, and 5mm thick is good for slate/concrete.
 Step 7
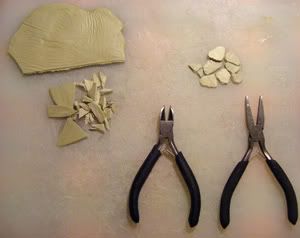
Once the putty is cured, you can break it up with pliers and shape it using clippers. For the flagstones, final shaping is done with a sharp knife and care!
 Step 8
Arrange the pieces on your base to make a slate-effect that is easy to stick and pin models to...
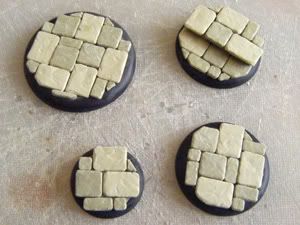
 Step 9
...Or to make flagstones that look really textured and chunky.
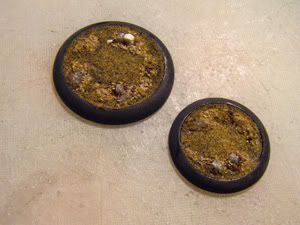
 Step 10
Or, ignoring making a sculpted top, you can go with the traditional sand/gravel.
For timber/wood effects, I get the best result from plastic styrene strip dragged over very coarse sandpaper. I then weather the parts with a very sharp knife (fresh blades really help here). I like the styrene over wood because I can stick it more easily and securely, because I can control the grain, and because I feel it paints up better than actual wood does.
I also polish the base edges with fine emery/sand paper before I put the final details on top, as they look much better (especially as I use a very matte finish).
Finally, after the base is painted and the model is attached (I paint the models off their bases), I stick a circle of black velour to the bottoms. This adds the final touch to the bases, and ensures that they don't slide about on most surfaces.
So there you have it; my overly complicated (but very satisfying) method of making bases!